Description
Building your own diy hydroponic system at home is very easy and a lot of fun.
All you will need are 3 items:
- The tank
- An hydroponic air pump
- Planting cups & sponges
Of course in addition you will also need plants to grow and the right type of plant food to add to the water.
I started it to grow DIY hydroponic tomatoes and peppers, but it was also great for herbs.
The DIY hydroponic system video shows how I build my own hydroponic system at home, taking less than 1 hour.

The DIY Hydroponic System
Taking the 3 items in turn:
Item 1 – the tank
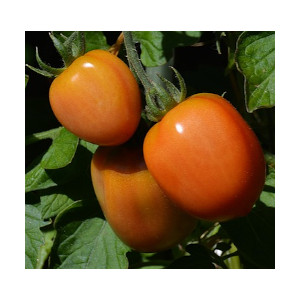
The reason I built the diy hydroponic system was to grow Roma tomatoes and Cayenne Peppers indoors.
Especialy Tomato plants can grow up to 1 to 1.5m tall
i.e. most of the small hydroponic units you buy are not suited as they are often designed for herbs & maybe lettuce.
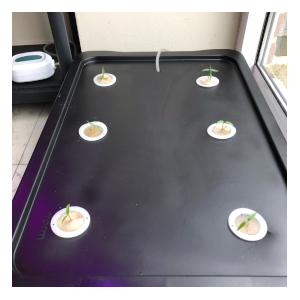
Which is why I made my own hydroponic tank – all I did was buy a 29 litre plastic storage container in a DIY shop and then drill the holes in the top.
Yes, you can buy containers on Amazon but they are often cheaper in DIY shops or even supermarkets.
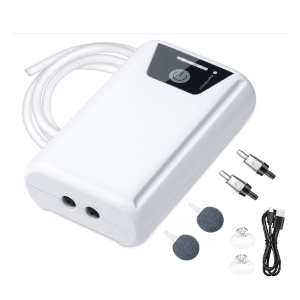
Item 2 – the hydroponic air pump
Within an diy hydroponic system you will need to provide your plants with air – to help them grow.
The air pump in this plan was specially selected for 2 main reasons:
- It’s very quiet – many hydroponic pumps tend to be noisy, whereas this pump (maybe because it’s designed for living room aquariums) is very quiet.
- Adjustable air flow – you will need to adjust the airflow depending on the size of tank. For a 29 litre tank just switch it to it’s lowest adjustment.
- Available from Amazon
Item 3 – The planting cups & sponge
You will need these to put in the lid of your container.
When drilling your holes in the top of your tank:
- Make a note of the top inner diameter of the cups you use.
- The holes in the video were 31 cm in diameter, but check your cups before drilling.
In the video you will see I only used 6 planting cups i.e. you will have lots left over for future use.

The total cost of the DIY hydroponic system
The cost for the unit was for me:
- The tank + lid = £4 (was on special offer)
- Hydroponic air pump = £12.99
- Cups & Sponge = £2 (ok total cost is more but only used 6)
- i.e. Total cost = £18.99
Please note this is an estimate but substantially lower than virtually any other ready made kit you can buy.
2 Important notes:
1. Black bin bags…
Just a quick update. Running the diy hydroponic system is very easy and enjoyable. The downside to using the clear plastic container was that algae started to grow, and I changed the water and cleaned the inside a few times.
However… Simply covering it with black bin bags stopped all that and kept the water crystal clear.
Update – 26 June 2021
Today painted the system black – a lot easier than using bags. Because the unit was very successful last year in growing Roma tomatoes I decided to plant Cayenne peppers this year. For the latest up to date info visit my instagram page
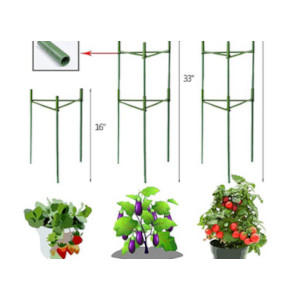
2. Plant support
The other item I simply hadn’t considered when building my diy hydroponic system was supporting the tomatoes. Which is not ideal when you can’t put a bamboo pole in the soil. However a free standing tomatoe support solved that problem.
Make your own diy hydroponic system or buy one ready made?
It a fun project to do but has some advantage & disadvantages:
Advantages:
- It is quite easy to do
- A lot cheaper than buying a ready made hydroponic kit
- Will give you hands-on practical experience of managing an hydroponic system
- And of course – your plants should grow faster with better yields (especially if you also use a grow light)
Disadvantages:
- The clear plastic could result in algae growth – replace the water if it gets bad & cover with black bin bags
- Depending on what you grow you might need to find a way of supporting your plants.
- Not as ‘professional looking’ as the ready made kits.
It is very early days, the kit has only just been made and will have to see the results. I will update this page over the following months.
On the other hand the ready made kits are easy to use and have been proven to work.
More information
Our facebook page has details of the latest articles and advice.